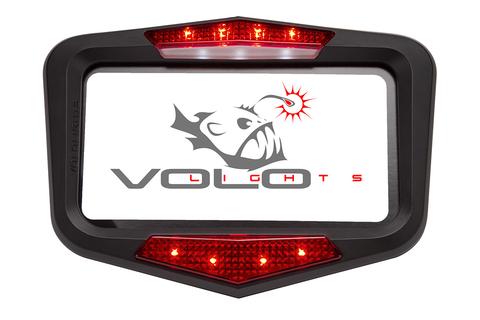
Honda Goldwing
This guide helps Honda Goldwing users install Vololights on their Goldwing. This installation was performed on a 2008. There may be some variation in different model years.
- Author: Faizal Ali
- Time estimate: 15 - 30 minutes
- Difficulty: Easy
Step 1 — Honda Goldwing 
-
There are four obvious bolts that needs to be removed.
-
The license plate also needs to be removed to access two additional bolt
-
The rubber grommet is where wires will be routed
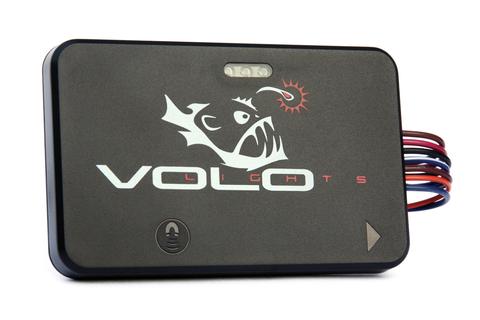
Step 2 
-
In this installation. We decided to leave the license plate illumination and tap the voltage with the posi-tap connector.
-
Brown is 12V and green is the ground.
Step 3 — Routing the wire 
-
The rubber grommet holes are widened with a drilled out to route the Vololight wires


One Comment
Step 1
Recommend reaching up inside (tire side) of the rear cover with a long screwdriver to aid in gently moving the plastic tabs so they release. The supplied twist-on self piercing electrical connectors easily slip over the wires leading to the license plate light. Once you take them apart, ensure you use the pointed end to perce the existing wires first. Attaching the Red & Blk wires of the new device to Brown & Green wires of the Goldwing was very simple. You will want an extra set of hands to hold the rear cover while you attach the wires and tuck the wire harness back in place.
07GW1800 - Reply